Who It Suits
Welding suits people who like precise, physical making with immediate, visible results. It rewards steady hands, spatial thinking, and comfort with machinery, because a good weld depends on reading the metal, holding a consistent travel speed, and trusting the process you have set up. It is a good fit if you want a hobby that leads to real repairs, custom builds, and functional objects — gates, brackets, furniture frames, bike racks — but it asks for respect for the equipment: the arc is hot, bright, and produces fumes, so the first sessions should happen in a class or shared shop.
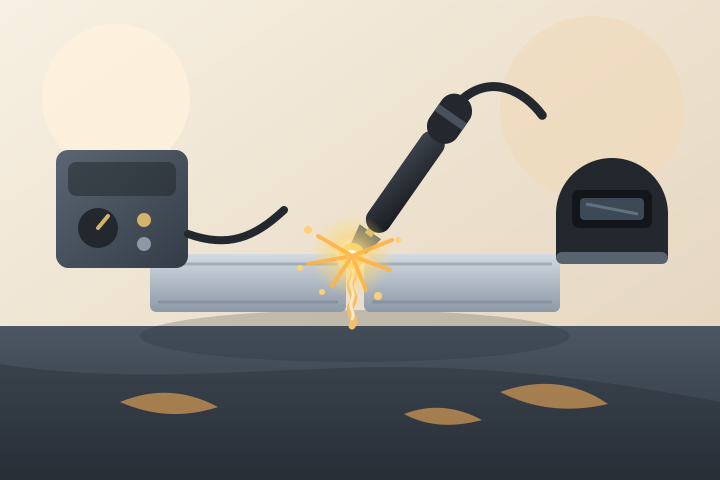
What you actually do: prepare two pieces of metal (cut, grind, and fit them so they sit flush), clamp them in position, set the machine, and strike an electric arc between a filler electrode and the joint. The arc melts the edges of the base metal and the filler into a pool that solidifies into a strong joint as it cools. A typical beginner session is laying practice beads on scrap steel: striking the arc, keeping the pool small, and moving at a speed that leaves a smooth, even bead. The appeal is concrete — you are literally fusing metal, and the joint you make is as strong as the metal itself. The honest constraints: it is technically demanding (the pool is a few millimetres wide and reacts instantly), it is loud and bright, it produces fumes that need extraction, and the equipment is a real investment, which is why most people start with instruction.
Getting Started
The core loop is the same for every weld: prepare and fit the joint, clamp it, set the machine, strike the arc, and travel at a steady speed while watching the pool. The main difference between processes is how the arc is fed and protected:
- MIG (GMAW) — a machine feeds a continuous wire electrode through a gun, with a shielding gas from a bottle. The most forgiving process for beginners: fast, consistent, and easy to keep the arc going. The usual first choice for general fabrication.
- Stick (SMAW) — a coated rod is held by hand and consumed as you weld. No gas bottle, works outdoors and in wind, and the machine is the cheapest route in. Less forgiving than MIG, and the finished weld needs chipping off slag.
- TIG (GTAW) — a non-consumable tungsten electrode strikes the arc while you feed a separate filler rod by hand. The most precise and prettiest process, and the hardest to learn; it is the route for aluminium, thin sheet, and visible work.
- Flux-cored — like MIG but the wire carries its own shielding flux; no gas bottle, but more spatter.
- Oxy-fuel — a gas flame heats the joint; used more for cutting and brazing than for structural welding, and a separate skill set.
Start with a beginner class, community fab shop, maker space, or trade-school open evening rather than buying equipment. Welding needs a machine, ventilation, fire-safe surfaces, and trained instruction, so the first step is learning the shop: how to fit a joint, how to hold the gun, what a good pool looks like, and what the machine settings do. Most beginner courses teach MIG or stick on mild steel, which is the easiest metal to weld.
Basic Gear
For your first sessions in a class or shared shop, you mainly need to dress for the job:
- A welding helmet with an auto-darkening filter (shade 10–13 for most arc work) — never look at an arc through sunglasses or a fixed-shade lens.
- A leather welding jacket or heavy leather sleeves, and leather gloves.
- Closed-toe leather boots; no synthetic fabrics, no loose sleeves, hair tied back.
- Hearing protection — striking the arc and grinding are loud.
- A notebook for settings, joint types, and lessons learned.
The shop supplies the rest: a welding machine, a wire gun or stick holder, a ground clamp, a grinding wheel for preparation, clamps and fixtures, and a fire-safe workspace.
When you later move toward home work, the first purchases are usually a MIG or stick machine (a used one is a sensible start), a wire gun or holder, a ground clamp, a grinder or angle grinder for preparation, a gas bottle if going MIG, and a supply of wire or rods. A proper welding table with clamps is a long-term investment, not a first purchase.
First Session
Use the first session to learn the loop on scrap mild steel, not to finish a project. Focus on:
- Striking the arc reliably: drag or tap the electrode in, then lift it to a small gap.
- Holding the correct arc length — roughly the diameter of the electrode — and keeping it steady.
- Travelling at a speed that leaves a smooth, even bead: too fast and the bead is thin and weak; too slow and it is a lumpy puddle.
- Watching the pool, not the arc: the pool should be a small, bright, oval melt that follows the electrode.
- Keeping your body position comfortable and your hands clear of the workpiece.
A good first session ends with a string of practice beads on scrap — some ugly, some decent — and notes on the settings and travel speed that worked.
First Month
Spend the first month repeating straight beads, then move to joints. The vocabulary that does most of the work:
- Arc — the electric discharge between electrode and work that melts the metal; its length and stability control everything.
- Bead — the deposited line of weld metal; a good bead is even in width, with regular ripples and no gaps.
- Penetration — how deep the weld melts into the base metal; shallow penetration is the classic weak weld.
- Base metal — the pieces being joined; filler — the added wire or rod.
- Shielding gas — the gas (argon, CO₂, or a mix) that protects the molten pool from the air in MIG and TIG.
- Spatter — tiny droplets of molten metal flung from the pool; normal, but excessive spatter means settings or fit-up are off.
- Slag — the glassy coating left on stick welds, chipped off after cooling.
- Tack weld — a small weld used to hold parts in position before the full weld.
- Joint — how the pieces meet: butt (edges face to face), fillet (an L-shaped corner, the most common joint), lap, tee.
- Heat-affected zone — the ring of base metal around the weld that was heated but not melted; its strength changes, which is why heat input matters.
- Amperage — the machine’s current setting; it sets the arc’s power and the pool’s size.
Keep projects small — a bracket, a shelf support, a repaired gate hinge — so each session teaches fit-up, settings, and travel speed.
Costs
Welding usually starts at a moderate to high cost, and the honest way to budget is by route (prices vary a lot by region and change over time, so check current listings before budgeting):
- Class route (recommended first): a single beginner class or workshop typically costs roughly US$50–200; a short course or community fab-shop membership costs more but includes instruction, machines, gas, and consumables.
- MIG route (home, later): a starter machine with gun, ground clamp, and a small gas bottle runs roughly US$300–800, plus wire, gas refills, and a grinder.
- Stick route (home, later): the cheapest entry — a machine and rods start around US$150–400, with no gas.
- TIG route (later still): a TIG machine with torches, tungsten, and gas runs roughly US$500–1,500 or more.
Lower-cost routes exist: maker spaces and fab shops charge modest membership or per-session rates, community colleges and trade schools run beginner courses, and used machines are widely available — a used MIG or stick machine is a common and sensible first purchase. Scrap mild steel is cheap, and offcuts are often free from local fabricators.
Space Needed
Home welding needs more planning than most hobbies, mostly for fumes and fire. A welding area needs ventilation or fume extraction (welding fumes are a genuine health hazard, not just an annoyance), fire clearance from walls, curtains, and anything flammable, a non-combustible floor, safe storage for gas bottles (upright, secured, away from heat), and room to move workpieces without tripping over cables. Many home welders work in a garage bay or outdoors with a windbreak. Noise and bright arc light are also considerations for neighbours and household members.
Beginners who use a class or shared shop normally only need space for notes, sketches, and finished pieces.
Solo or Social
Welding can feel solitary at the bench, but it is best learned socially. Classes, fab shops, maker spaces, and local welding clubs help beginners learn safe habits, get their settings diagnosed, and see what a good weld looks like up close. Shop etiquette matters: one person at a machine at a time, ask before using someone else’s tools, and keep the area clear while the arc is struck. The American Welding Society (AWS) and national welding institutes run training, certification, and community programs that are a common next step after a first class.
Common Mistakes
- Buying a machine before taking a class.
- Welding dirty, rusty, or painted metal without grinding it clean first.
- Travelling too fast — thin, weak beads with poor penetration.
- Travelling too slow — lumpy puddles, burn-through on thin metal.
- Poor fit-up: gaps and misaligned edges that no amount of weld metal can fix.
- Skipping the helmet, gloves, or ventilation.
- Ignoring fume extraction and welding in a closed, unventilated space.
- Leaving a hot workpiece or grinding sparks near anything flammable.
Safety / Accessibility
The arc is the central hazard: it is far brighter than the sun, produces fumes, and can start fires. The basics that shops enforce for good reason:
- Eye and face protection — always use a proper welding helmet with the correct shade; OSHA requires eye and face protection where flying particles and intense light are hazards (29 CFR 1910.133), and welding-specific requirements in 29 CFR 1910.252. Looking at an arc even briefly can burn the cornea (“arc eye”), and the ultraviolet light is a burn hazard to exposed skin.
- Fumes — welding fumes contain metal oxides and other particles; OSHA and NIOSH set exposure limits for welding fumes and for manganese, a common component of electrode fumes. Use local exhaust or a fume extractor, ventilate the space, and never weld in a sealed room.
- Fire — the arc and hot slag can ignite nearby materials; keep a fire extinguisher within reach, clear the area of flammables, and do a fire watch after hot work.
- Clothing — leather jacket and gloves, closed-toe boots, no synthetics, hair tied back; the arc can ignite or melt synthetic fabric.
- Hearing protection — striking arcs, grinding, and chipping slag are loud; OSHA’s hearing-conservation requirements apply (29 CFR 1910.95).
- Gas bottles — store upright, secured, away from heat and the welding area; check hoses and connections.
Local rules can add constraints: some areas regulate open flame, fumes, or noise, so check local requirements before setting up a home welding area. Welding is generally a teen-to-adult activity because it combines heat, electricity, and judgment; younger participants need close supervision, and TIG and oxy-fuel work in particular are adult activities.
Lighter machines, seated work, shorter sessions, assisted clamping, and well-fitting PPE can make parts of the hobby more accessible; the physical demands are moderate, but the arc and fumes set firm limits on where and how it can be done.
Where It Can Go
Welding can lead toward metal fabrication, architectural ironwork, sculpture, furniture making, motorcycle and vehicle repair, boat building, bladesmithing (which adds forging and heat treatment), or small-batch selling. Blacksmithing sits nearby as a complementary route — forging shapes the metal, welding joins it — and the two skills together cover most metalwork.
References
Last reviewed: 18 August 2026.
Official and institutional sources:
- OSHA: Welding, Cutting, and Brazing — the official safety entry point for welding hazards.
- OSHA 1910.252: Welding, cutting, and brazing — the welding-specific standard covering PPE, ventilation, and fire prevention.
- OSHA 1910.133: Eye and face protection — eye and face protection requirements, including against intense light.
- NIOSH: Welding Fumes and Manganese — the metal-fume hazards of welding and official exposure limits.
Community resources (optional):
- American Welding Society — training, certification, standards, and community for welders.
Related Hobbies
Blacksmithing, metal fabrication, model making, jewellery making, electronics, and clockmaking are natural neighbours — they share tool skill, material awareness, and the discipline of precise, safety-first making.